Guaranteed To Last 10+ Years
Sharie-Proof Finish
Self Install or Hire Us!
test page - Resurfacing
Whiteboard Resurfacing
Chalkboard Resurfacing
Refinish Your Whiteboard Paint
HIGHEST QUALITY
WHITEBOARD FILM
REPURPOSE EXISTING
INFRASTRUCTURE
WORKS WITH EVERY
DRY ERASE MARKER
Want A Quick Estimate?
Why Resurface Your Whiteboards?
- Convert your old boards in under 15 minutes a piece.
- Keep your old and sturdy infrastructure with our high quality finish
- Save on an asbestos abatement if your classrooms might have asbestos
- Save your old boards from going into the landfill
- Keep your technology healthy by removing chalk dust from the air
- Save your facilities team time and energy. Super easy cleaning.
Why Resurface With Think Board?
- Scratch-Resistant & Sharpie-Proof Finish
- Quick, Easy, and Bubble Free Installation, guaranteed
- Free Replacements for 10 Years if you have any issues
- Think Board works with all dry erase markers and will always be clean
- Permanent markers erase cleanly with rubbing alcohol
- No expo spray cleaner needed. Just water and a cloth!
- Our Whiteboard Resurfacing Sheets are easier to install than alternatives.
- We also offer a Magnetic Think Board that converts non-magnetic boards into premium quality magnetic whiteboards.
Why Resurface Your Boards
Think Board Review
Want To Hear How We Can Help Your School?
Connect with us before October 31st
And we'll include the install kit for free! ($85 value)
Case Studies: Hear How We Helped Other Districts!
Pricing & Warranty Information
What Can Think Board Do?
Pretty Much Anything Dry Erase!
Restore Your Old Whiteboards
Save money, hassle, and cleaning time for your staff
And Make Them Brand New Again.
10-Year Lifespan. No chemicals needed for cleaning. Ultra durable.
Don't Settle For Cheaper Dry Erase Films
They crack and bubble over time. We've seen this too much to count.
10+ Years Guaranteed. You Won't Regret It
If you do, we'll replace or refund you. You're in good hands.
Custom Staff For The Music Room?
We can do it all. Custom charts, grids, dot patterns, logos. You name it
Or Gridlines For Math Class?
Don't throw away a sliding system... Resurface with Think Board!
Whiteboard Paint Resurfacing
Trust us... We've resurfaced hundreds of walls like this
Go Floor-To-Ceiling With Think Board Instead!
With a small seam, a wall-to-wall whiteboard is easy!
Or Grab A Classroom Set!
In under 20 minutes you could convert your entire classroom
Create A New Way To Engage Students
Just peel & stick. Precut to size.
Whiteboard Tables In The Classroom
There when you need it. Invisible when you don't.
Or Cover The Table In The Back With White
Resurface old tables that otherwise might go to the landfill
We Can Custom Cut To Fit Your Desks
In premium clear or premium white.
Or Custom Size For The Library Tables
Why not give the students more places to collaborate?
Looking for 1 or 2 to start? Grab some today!
Frequently Asked Questions
How Long Will It Last?
Here's the deal.
On a verticle surface (walls, cabinets, chalkboards, whiteboards, windows, doors, or anything else that's smooth), our Premium Think Boards should last 10-15 years!
On horizontal surfaces, we estimate they'll last 1-2 years. We've testing in the harshest of environments... a 7th grade classroom. And what we found is.... it depends on the teacher. The reason is because students love to pick at the corners and it's pretty challenging to police them. We've tried taping the corners down and we've even tried making the adhesive stronger, but it ultimately comes down to the teacher. On kidney tables or other tables, they seem to hold up for much longer! The film has scratch resistent properties. So even with computers, books, pen & paper, etc. being used on top, they will still hold up.
Our recommendation? Get kids moving! Cover cabinets, walls, doors and anything else that gets kids up and out of their seats. Studies show that students are more engaged and creative when working on their feet. Or... cover a kidney table in the back of your classroom and use it for group projects and other fun activities :)
We LOVE going into classrooms to see how our teachers have utilized Think Board in their rooms and love to see the impact it has on the student. So, while the product is not perfect, it still can add tremendous value to a class for years it's in use. And hey, if you don't like them, we have a pretty sweet 100-day return policy where we'll replace or return anything that is not meeting expectations!
People also ask: How long do I need to wait after installing?
The Answer: no time at all! Once the Think Board is installed, it is ready to go!
What Are Real Teachers Saying?
Chalkboard Resurfacing Review
Ms Brown asked us to come change her chalkboards into whiteboards with our Premium Think Board film. And we did! Here is her initial reaction halfway through the install :)
How Fast Will They Arrive?
Website orders ship within 24 hours! We typically ship USPS out of NY, which means 2-day shipping to most customers in the Northeast and 3-days for the rest of the country.
Bulk Resurfacing orders take about 1-2 weeks to process, and 2-3 days to ship.
Can You Do Custom Sizes & Designs?
Charts, graphs, music lines, you name it!
Just measure your old boards, wall space, cabinets, etc and fill out the form below!
How Is It Better Than Whiteboard Paint?
As you can see, this is an image of a Think Board on top of "old" whiteboard paint. The paint was painted about 2 years ago, but is long overdue for a fresh coating. While this Think Board has only been on the wall for 6 months (at the time of this photo), it's clear that the Think Board erases much cleaner.
If you have regular paint, and you're thinking about whiteboard paint... consider the cost of paint + cost of a professional install + 7 days of waiting time before you can use the wall + the harmful VOCs that are offgasing from the paint. Also, when you want to remove the paint, you'll need to sand the wall down and repaint to get the wall back to normal. Not ideal...
Sadly, about 85% of the people we talk to were unable to install their paint properly... and therefore, it looks like this (see image).
If you have old dry erase paint, our Premium Think Boards will stick right onto the paint. We recommend heavilty scrubbing the walls prior to install, because this image is not how you want your office to look.
We'd be happy to send you a case study we did on Think Board vs Whiteboard Paint or put you in touch with schools who have experience with both Think Board and Whiteboard paint.
As you can see, this is an image of a Think Board on top of "old" whiteboard paint. The paint was painted about 2 years ago, but is long overdue for a fresh coating. While this Think Board has only been on the wall for 6 months (at the time of this photo), it's clear that the Think Board erases much cleaner.
If you have regular paint, and you're thinking about whiteboard paint... consider the cost of paint + cost of a professional install + 7 days of waiting time before you can use the wall + the harmful VOCs that are offgasing from the paint. Also, when you want to remove the paint, you'll need to sand the wall down and repaint to get the wall back to normal. Not ideal...
Sadly, about 85% of the people we talk to were unable to install their paint properly... and therefore, it looks like this (see image).
If you have old dry erase paint, our Premium Think Boards will stick right onto the paint. We recommend heavilty scrubbing the walls prior to install, because this image is not how you want your office to look.
What Else Should I Definitely Know?
Installing Like A Pro
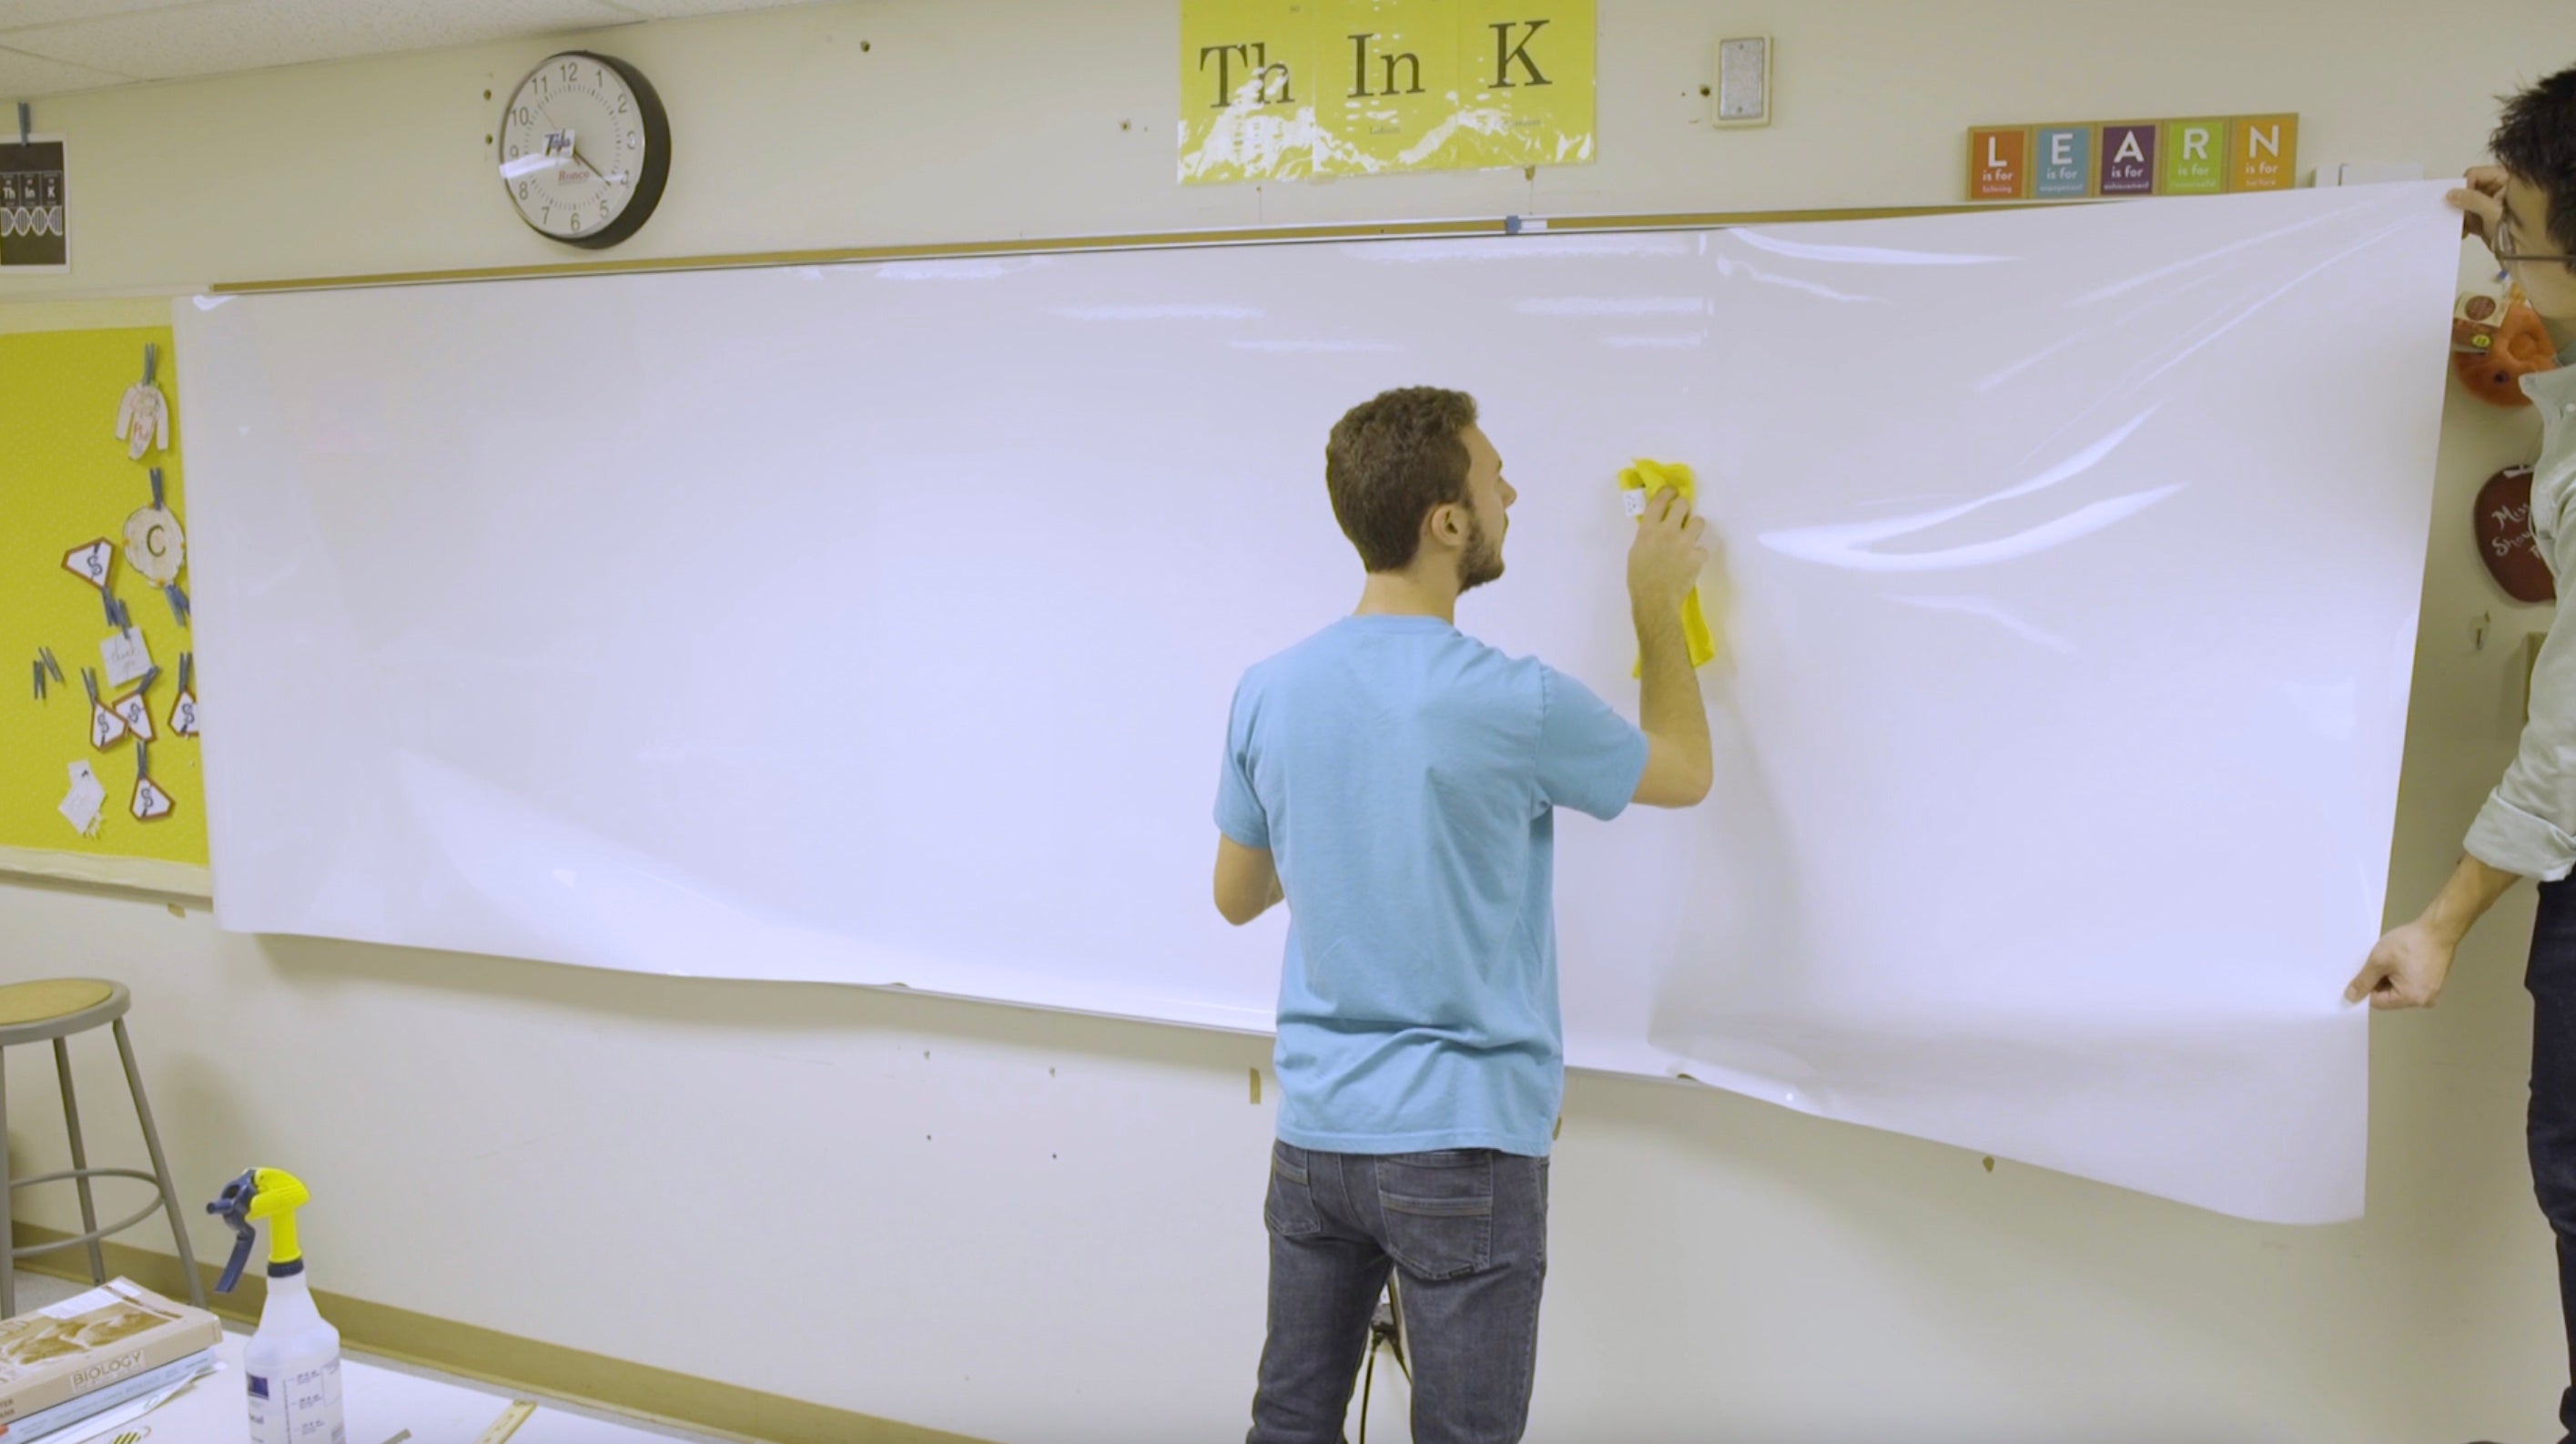
The secret to a perfect install is cleaning more than you think. Wipe down your wall prior to the install. Make sure there aren't any small bumps or paint drips on the wall (because those will show through). Use a wet cloth to wipe down the wall, and scratch off any small imperfections with your finger nail. No need to sand the wall... that's just a hassle. We've installed over 1000 boards, personally... and what we've found is that the more you can float the Think Board onto the wall, the easier it will be. Watch our video (even if you watch it in 2x speed...) to see our technique!
Fresh Paint offgases.
What that means, is that gas is literally coming out of your walls for a few weeks after you paint. Yup.. kind of gross. So, what we recommend is to wait at least 30 days post-painting to allow your wall to release some of these gasses. Because if not, the gasses will create bubbles underneath your Think Board :( And that's not fun. Or, worst case, it could push the entire Think Board off the wall, onto your floor. And no one wants that...
Dry Install vs Wet Install
You can peel & stick the Think Board onto any smooth surface. However, smoother surfaces require a little prep. Installing over glass or super smooth surfaces (like an old whiteboard/chalkboard) required a "wet install." Pretty much, what that means is you want to mist the surface with water prior to installing. This will help you smooth out any bubbles and helps the Think Board go on easily! Don't worry, the water will dry soon and look perfect in a few hours! See more info at the bottom of the page for instructions on wet installing over a whiteboard or a chalkboard.
We recommend wet installs on:
• Glass
• Whiteboards/Chalkboards
• Refrigerators
• Super smooth desks/tables
(In)frequently Asked Questions
Hit the Live Chat button below! We have a team of experts standing by. For YOU!
Here's what most of our schools do:
If you are looking for a whiteboard solution, you came to the right place. Whether you're resurfacing 50-year-old chalkboards or whiteboards that aren't erasing, Think Board is the best option for quality, longevity, and ease of install.
Most whiteboards & chalkboards are about 1-2 inches shy of the stock sizes. Meaning, a whiteboard that measures 46"x94" can be resurfaced with a 48"x96" (4'x8') Think Board. We include an extra couple inches for wiggle room!
We include basic installation tools in every order, but if you are ordering more than 5 boards, consider checking out our Premium Resurfacing Kit
Best for:
Covering Any Table
Most kidney tables we see are about 4'x6'. If you need custom printing, check out our custom page here!
ps. you can also trim the board with scissors or a utility knife if you need to cut them in half or trim them to size!
3. Check out our Classroom Set.
Best for:
Student-Centered Learning
Engaging All Types Of Students
Great for differentiating instructions for kids. Think Board creates a very experiential and kinesthetic learning process for the kids. It is much better for muscle memory, and the kids have so much fun using it! Some of our teachers structure their classrooms in a Socratic circle so they can go around and give students instantaneous feedback if they’re doing something wrong.
Rough idea of what you want? Fill out the form and we'll reach out!
How To Resurface A Whiteboard
Whiteboard Resurfacing - How To Resurface A Whiteboard
The secret to restore a whiteboard is the prep work. Check out our recommended tool list before installing. All orders come with a basic set of tools to install (cleaning cloth, retractable knife, squeegee). We also have the option to purchase the Premium Resurfacing Kit if you'd like.
1. Clean The Board
Wipe down the board with a microfiber cloth and water. The goal is not to get the original board clean & white. The goal is to remove any dust, debris, or leftover adhesive on the board. We normally include a little scraper to help remove all of this! The cleaner the board, the better the Think Board will look :)
Sometimes old whiteboards have raised bumps or holes in them. If needed, take a sander to smooth the surface down a bit. Nothing crazy, but just enough to even out that spot (we use 240-600 grit sand paper). If you have the opposite problem, consider filling the hole with Spackling paste and then sanding once dry.
Use a moist rag to wipe around the frame of the whiteboard as well as the marker tray to get rid of any stray dust. Why? Generally, we make the Think Boards a little larger than the boards being resurfaced. This gives you room to hold onto the edge of the Think Board and manipulate it more easily, but it also means more adhesive that can pick up dust or move dust. Dust will cause tiny debris bumps under the Think Board.

2. Remove Old Tape/Adhesive
Scrape the original board with a razor to get rid of any tape, paint droplets, glue, or whatever crusty weird stuff is on the board from the last 10-100 years of use.
If you’re resurfacing several boards, it's worth it to invest in a heavy-duty paint scraper.
3. Wipe Down With Rubbing Alcohol
If you’ve got crazy duct tape or something ridiculous that won’t clean off, use rubbing alcohol and a microfiber cloth.
Once the board is good to go, we recommend doing one final wipe-down in 1 direction. This helps to push dust in one direction and off your board instead of spreading it around in circles.

4. Mist Old Board With Water
Spray your old whiteboard down with plenty of water before you stick the Think Board onto the original surface. Why? When the board is wet, the Think Board’s adhesive won’t stick as hard and you’ll be pushing water bubbles instead of air bubbles. Water bubbles don’t compress, air bubbles do. It will save you time in the long run because you’ll be doing much less fixing.

5. Expose 8-12 Inches Of Adhesive And Unroll Onto Whiteboard
Most of the time, we do not have enough table space to lay the Think Board flat and remove the entire backing. So instead, we expose just enough adhesive to create a hinge on one side. With the edge secured in place, you and a 2nd person can then unroll the Think Board while removing the backing from the Think Board. The goal of this is to simply get the Think Board close to the right position. (This is why cleaning the edges, trays, and anything else that is dusty is important because this is where the Think Board could accidentally pick up random dust)


6. Reset The Think Board Into Place
Since the board is wet applied, you can easily adjust the Think Board. You will need a 2nd person for this step. If the board is longer than 12 feet, you will want a 3rd person to support the middle. Be sure to hold the edges of the Think Board tightly. We've dropped a board or two here
Peel the Think Board off the old board and gently float it into place. Don't worry, if you don't like how it set onto the board, you can try again. If you retry more than twice, it helps to have someone mist the board again.
Most of the time, we try to align the top edge of the Think Board just below the metal/wood edge. Why? It saves us an extra cut at the end and we can generally get it within 1/16th of an inch. If you can't get it that close or want to make it a little easier, give yourselves a 1-2 inch overlap on the top. That way, you don't need to worry about alignment. If the board is longer than 12 feet, we recommend overlapping the top edge because the droop in the middle is a little too hard to get perfect. That's where the 3rd person comes in!

7. Squeegee Out The Bubbles, Starting From Center
Once you're happy with how the Think Board is set, we can touch the top 2 corners of the Think Board onto the whiteboard to make sure they stay in place.
To begin, walk to the center of the board and make a vertical stroke. Start from the middle and push up, and then return to the middle and push down. This creates a center hinge and will allow you to reset the tension on both the left and the right sides.
While standing at the center line with your hands on the Think Board (so it doesn't fall off), have your partner peel back the left side of the Think Board until the center line. This resets the tension. They can either hold it here for you as you begin squeegeeing, or float it back onto the whiteboard.
Start squeegeeing in that direction. Make sure that every stroke overlaps the previous one. Normally we do a 12-inch horizontal stroke from the center, pushing left, and then overlapping horizontal strokes up to the top, and then overlapping strokes to the bottom. And then we begin the next 12" chunk. Overlapping strokes will help you prevent leaving behind small gaps which will become bubbles. Once the left side is complete, go back to the center, have your partner reset the right, and repeat.
Bubbles happen when there is extra tension somewhere where there should not be. Resetting often helps relieve the tension. If you would like to be extra cautious, squeegee about 1-2 feet, pin the board in place, and have your partner reset. And keep repeating this until the edge.
Whenever you adjust the position of the Think Board, check to make sure there is enough water so that you have the flexibility to continue adjusting.

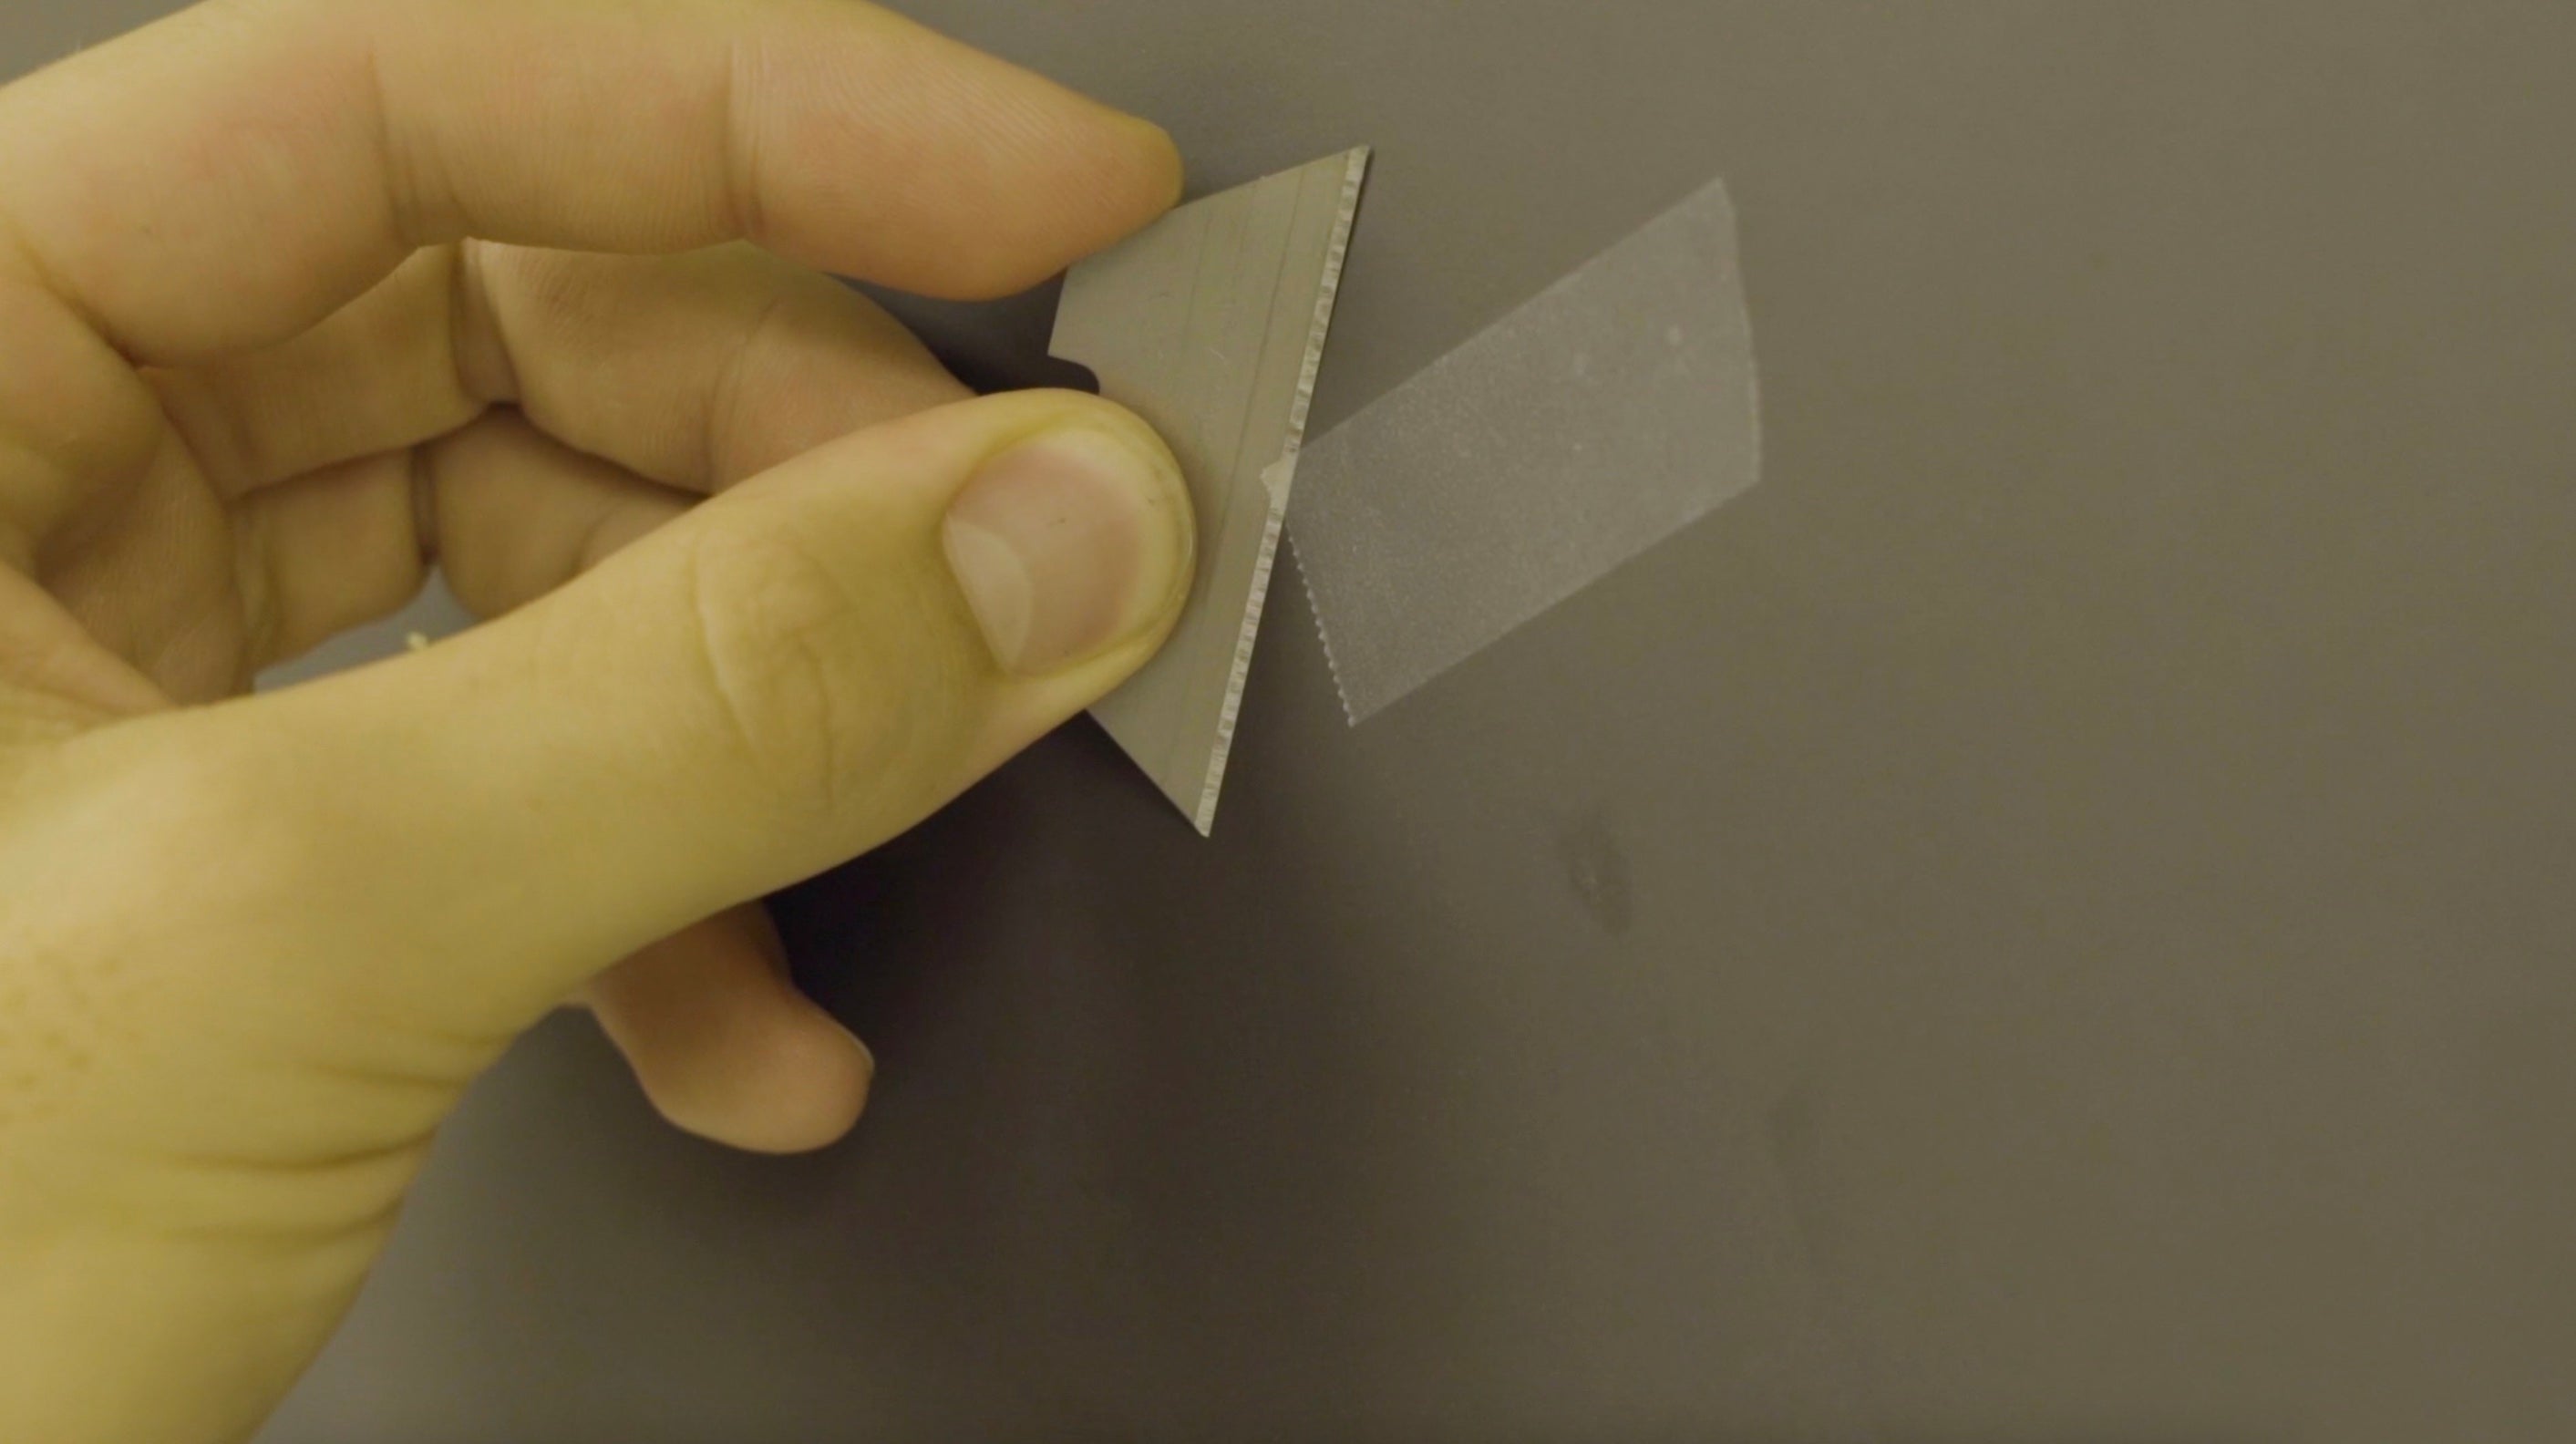
8. Trim The Edges
For cutting the edges, take your squeegee in one hand and your retractable knife in the other hand and run both together around the edge of your original board.
Why? When running the squeegee and the knife together, you have a guide on both sides of the blade, this prevents your hand from slipping. The squeegee also makes sure that the edges are pressed down the best that they can be throughout your cut.
When wet applying, a wet board might not lay perfectly flat when you are using cutting into it and pulling at it with the razor. The squeegee will help make sure that everything lays flat as you are cutting.
Replace your knife blades often. A new one for every 2 or 3 boards isn’t a bad idea.

9. Add Think Board Sticker & Cloth
We include a Think Board "Best Cleaning Practices" sticker with every board, as well as a Think Board microfiber cloth. We normally place the sticker in the bottom left or bottom right corner of the board. The cloth can be washed easily in the laundry whenever it gets too dirty.
10. Tell Your Friends :)
Think Board has grown almost entirely on Word Of Mouth. We feel it's much more impactful for someone like you to recommend Think Board to another teacher, school, or district. So if you're excited about this super-high-quality-amazing-new-whiteboard that you now have in your classroom/school, consider sharing the love and telling others!
Bonus:
We can Facetime/Video Call in and talk you through it if you are having trouble. We are here to help and if your install really doesn’t go well, we can send you another. :)
Just shoot us an email, hello@think-board.com
Or a call/text - (617) 657-9616
Think Board Resurfacing - How To Resurface A Chalkboard
The secret to a beautiful install is the prep work. Check out our recommended tool list before installing. All orders come with a basic set of tools to install (cleaning cloth, retractable knife, squeegee). We also have the option to purchase the Premium Resurfacing Kit if you'd like.
1. Clean The Board
Wipe down the board with a microfiber cloth and water. The goal is not to get the original board clean & white. The goal is to remove any dust, debris, or leftover adhesive on the board. The cleaner the board, the better the Think Board will look :)
Use a moist rag to wipe around the frame of the chalkboard as well as the marker tray to get rid of any stray dust. Why? Generally, we make the Think Boards a little larger than the boards being resurfaced. This gives you room to hold onto the edge of the Think Board and manipulate it more easily, but it also means more adhesive that can pick up dust or move dust. Dust will cause tiny debris bumps under the Think Board.
2. Remove Old Tape/Adhesive
Scrape the original board with a razor to get rid of any tape, paint droplets, glue, or whatever crusty weird stuff is on the board from the last 10-100 years of use.
If you’re resurfacing several boards, it's worth it to invest in a heavy-duty paint scraper.
3. Wipe Down With Rubbing Alcohol
If you’ve got crazy duct tape or something ridiculous that won’t clean off, use rubbing alcohol and a microfiber cloth.
Once the board is good to go, we recommend doing one final wipe-down in 1 direction. This helps to push dust in one direction and off your board instead of spreading it around in circles.
4. Mist Old Board With Water
Spray your old chalkboard down with plenty of water before you stick the Think Board onto the original surface. Why? When the board is wet, the Think Board’s adhesive won’t stick as hard and you’ll be pushing water bubbles instead of air bubbles. Water bubbles don’t compress, air bubbles do. It will save you time in the long run because you’ll be doing much less fixing.
5. Expose 8-12 Inches Of Adhesive And Unroll Onto Chalkboard
Most of the time, we do not have enough table space to lay the Think Board flat and remove the entire backing. So instead, we expose just enough adhesive to create a hinge on one side. With the edge secured in place, you and a 2nd person can then unroll the Think Board while removing the backing from the Think Board. The goal of this is to simply get the Think Board close to the right position. (This is why cleaning the edges, trays, and anything else that is dusty is important because this is where the Think Board could accidentally pick up random dust)
6. Reset The Think Board Into Place
Since the board is wet applied, you can easily adjust the Think Board. You will need a 2nd person for this step. If the board is longer than 12 feet, you will want a 3rd person to support the middle. Be sure to hold the edges of the Think Board tightly. We've dropped a board or two here
Peel the Think Board off the old board and gently float it into place. Don't worry, if you don't like how it set onto the board, you can try again. If you retry more than twice, it helps to have someone mist the board again.
Most of the time, we try to align the top edge of the Think Board just below the metal/wood edge. Why? It saves us an extra cut at the end and we can generally get it within 1/16th of an inch. If you can't get it that close or want to make it a little easier, give yourselves a 1-2 inch overlap on the top. That way, you don't need to worry about alignment. If the board is longer than 12 feet, we recommend overlapping the top edge because the droop in the middle is a little too hard to get perfect. That's where the 3rd person comes in!
7. Squeegee Out The Bubbles, Starting From Center
Once you're happy with how the Think Board is set, we can touch the top 2 corners of the Think Board onto the chalkboard to make sure they stay in place.
To begin, walk to the center of the board and make a vertical stroke. Start from the middle and push up, and then return to the middle and push down. This creates a center hinge and will allow you to reset the tension on both the left and the right sides.
While standing at the center line with your hands on the Think Board (so it doesn't fall off), have your partner peel back the left side of the Think Board until the center line. This resets the tension. They can either hold it here for you as you begin squeegeeing, or float it back onto the chalkboard.
Start squeegeeing in that direction. Make sure that every stroke overlaps the previous one. Normally we do a 12-inch horizontal stroke from the center, pushing left, and then overlapping horizontal strokes up to the top, and then overlapping strokes to the bottom. And then we begin the next 12" chunk. Overlapping strokes will help you prevent leaving behind small gaps which will become bubbles. Once the left side is complete, go back to the center, have your partner reset the right, and repeat.
Bubbles happen when there is extra tension somewhere where there should not be. Resetting often helps relieve the tension. If you would like to be extra cautious, squeegee about 1-2 feet, pin the board in place, and have your partner reset. And keep repeating this until the edge.
Whenever you adjust the position of the Think Board, check to make sure there is enough water so that you have the flexibility to continue adjusting.
8. Trim The Edges
For cutting the edges, take your squeegee in one hand and your retractable knife in the other hand and run both together around the edge of your original board.
Why? When running the squeegee and the knife together, you have a guide on both sides of the blade, this prevents your hand from slipping. The squeegee also makes sure that the edges are pressed down the best that they can be throughout your cut.
When wet applying, a wet board might not lay perfectly flat when you are using cutting into it and pulling at it with the razor. The squeegee will help make sure that everything lays flat as you are cutting.
Replace your knife blades often. A new one for every 2 or 3 boards isn’t a bad idea.
9. Add Think Board Sticker & Cloth
We include a Think Board "Best Cleaning Practices" sticker with every board, as well as a Think Board microfiber cloth. We normally place the sticker in the bottom left or bottom right corner of the board. The cloth can be washed easily in the laundry whenever it gets too dirty.
10. Tell Your Friends :)
Think Board has grown almost entirely on Word Of Mouth. We feel it's much more impactful for someone like you to recommend Think Board to another teacher, school, or district. So if you're excited about this super-high-quality-amazing-new-whiteboard that you now have in your classroom/school, consider sharing the love and telling others!
Bonus:
We can Facetime/Video Call in and talk you through it if you are having trouble. We are here to help and if your install really doesn’t go well, we can send you another. :)
Just shoot us an email, hello@think-board.com
Or a call/text - (617) 657-9616